

Coming to life
From sketch to out to lunch, how a ring comes to life

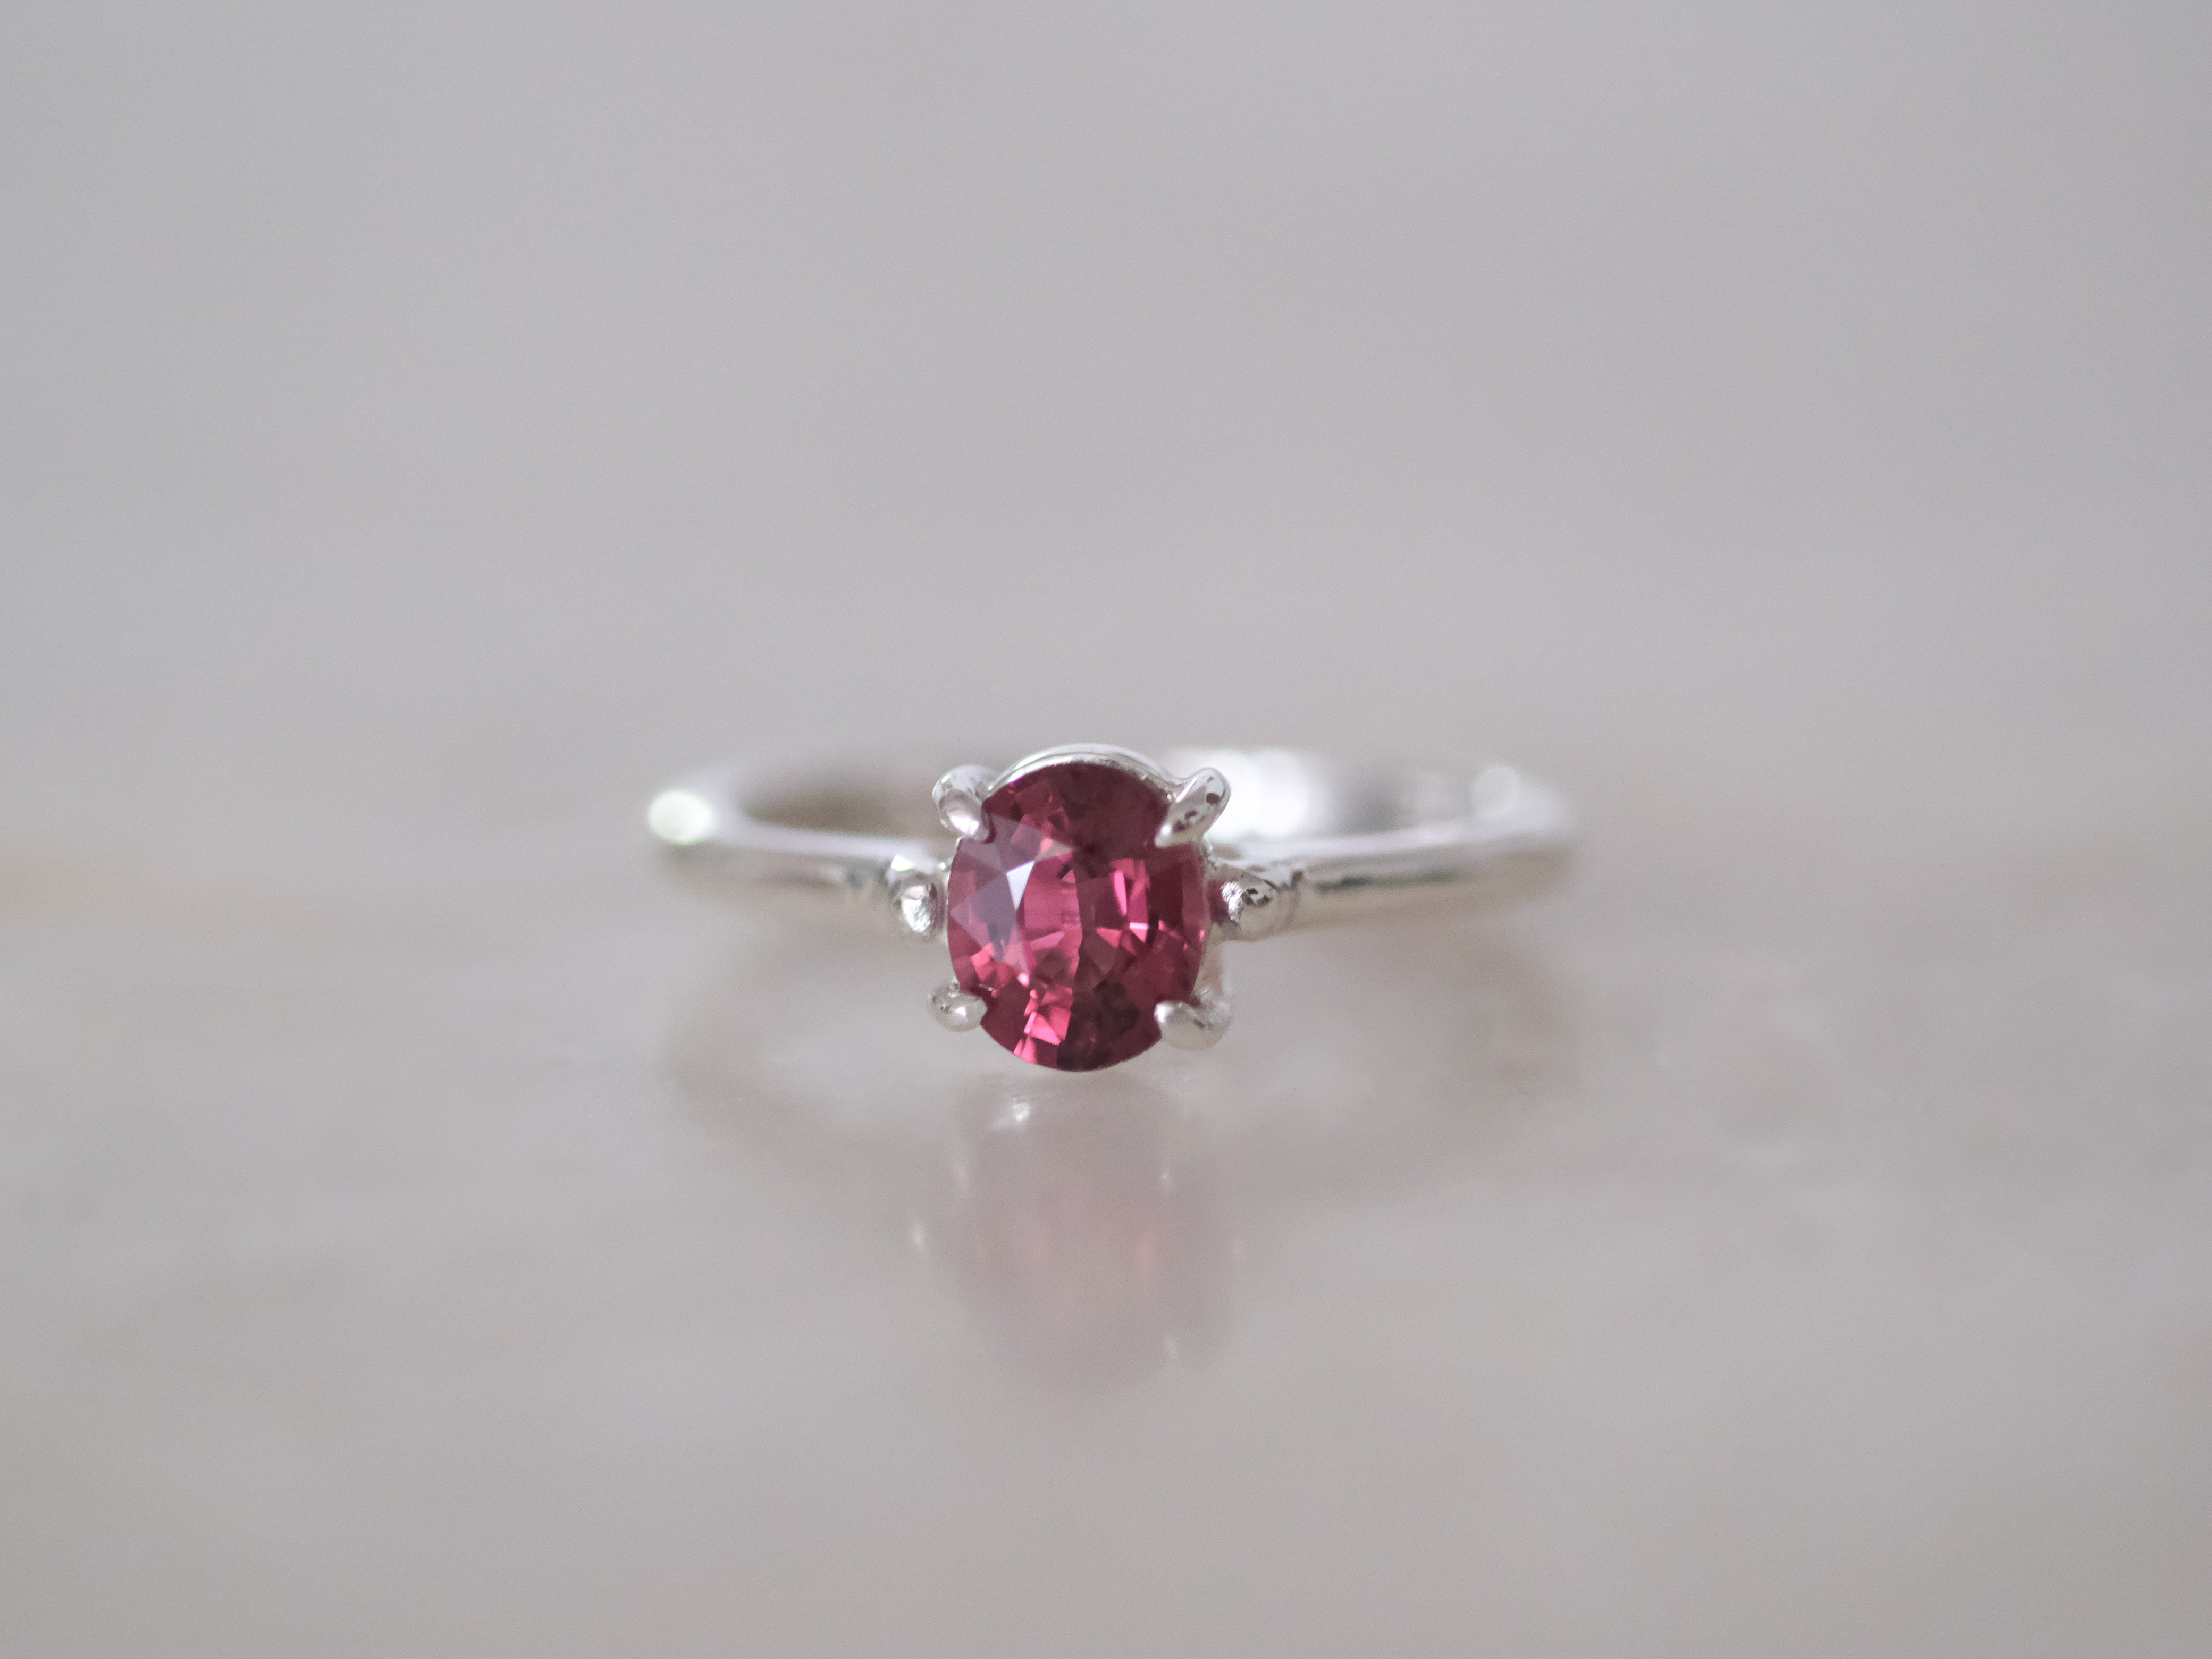
Looking down at the maroon stone on my finger these past few days has made me so happy. I finally finished a cathedral ring that has pushed me for weeks. It’s the most complex fully fabricated piece I’ve made to date and it left me feeling both more capable and more energized about what I can take on next.
The solitaire cathedral silhouette is a classic as one of the most well-loved engagement ring styles, and tackling it early felt like the right way to build solid fundamentals. I’m glad I did!
Process stages


Like many of my pieces, this ring started as a simple sketch. But with its more architectural lines, it demanded extra planning compared to my earlier projects. The raw materials were just the stone and a length of 2 mm 950 silver wire. (950 silver has a higher silver content than standard sterling, which is 92.5%, so it offers a brighter finish and better resistance to tarnish.)
I began by forming the shank with pliers and gradually lifting it into the cathedral rise. Once the basic silhouette felt balanced, I moved on to building the bezel and prongs for the stone.
After that, it became a careful cycle of filing and sanding to refine the ring’s shape. When everything aligned properly, I soldered the stone’s seat to the body and gave the ring a good polish before shaping the prongs.
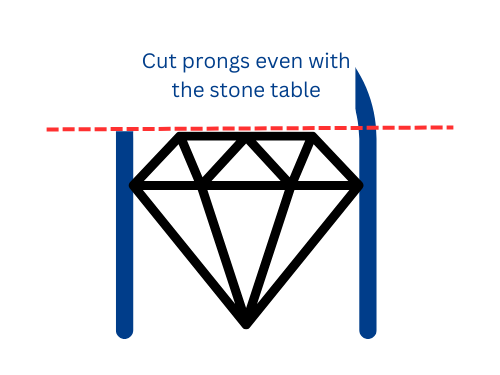
For the prongs, my Sensei shared a helpful rule of thumb: cut them to the height of the stone’s table. From there, you can sculpt, refine, and finally set the stone into place.
This ring stretched me in all the right ways. It challenged my planning, my approach to construction, and perhaps most of all, my patience. But working through those tough moments reminded me how much progress comes from choosing projects that sit just beyond my comfort zone.
Now on to my next project, which features an even smaller sapphire!